The holiday season is upon us, and if you’re scrambling (like we are) to assemble thoughtful gifts for all the special people in your life, you may not need to search further than your pantry. We’ve turned to local food expert, Maggie Battista, who demonstrates just how kind and rewarding a gift from the kitchen can be.
“Food is almost never an inappropriate gift,” writes Battista, author of “Food Gift Love” and founder of Eat Boutique, a food-gift blog and business.
Eat Boutique started as a culinary journal of sorts, which satisfied Battista’s passion for food. Then she moved to Paris, where so many restaurants focused on small-batch, handmade quality over quantity. When she returned to the United States, she began an intense quest for exceptional local ingredients. All of the work testing, eating, and making “felt like an unofficial Ph.D. program in tasting,” she writes.
Her search proved fruitful. Eat Boutique is now an award-winning online shop and recipe site, and her many followers reap the benefits of her continuous discoveries. In her cookbook, “Food Gift Love,” Battista has produced 100 recipes to make, wrap and share. Each entry includes step-by-step instructions as well as suggestions for gift wrapping, and all of them can be whipped up in the comfort of your kitchen. No time this holiday season? Don’t worry—her gifts are meant to be year-round.
“You’ll discover how natural it is to craft food gifts to store in your ‘Food Gift Love’ pantry for whenever the need may arise or to offer for specific occasion to your loved ones or to the neighbor down the street who just popped in to share tomatoes from her yard,” she writes. “In fact, gifting food with food is like a double rainbow—transformative and remarkable and entirely too rare. Let’s change that.”
From mint tea in jars to homemade granola in stamped bags, we’ve collected four favorites from her pages:
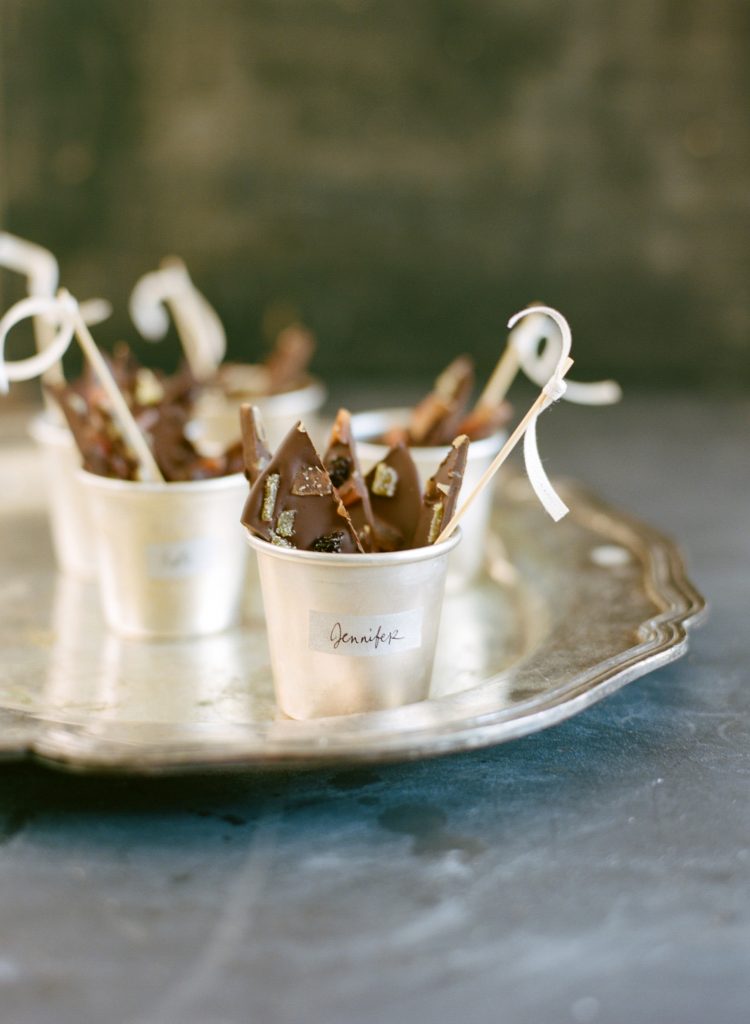
Fruit & Ginger Bark
Makes: 12 to 18 pieces
Preparation Time: 10 minutes active time (up to 2½ hours total time)
Special Equipment: Double boiler
Ingredients
⅔ cup dried fruit (apricots, cherries, cranberries, raisins)
1 tablespoon candied or crystallized ginger
2 (3.5 ounces each) dark chocolate bars, 70% to 75% cocoa
Directions
1. Cut a piece of parchment paper to fit a standard baking sheet. Make a space in your fridge to fit the baking sheet.
2. Chop the dried fruit and candied ginger into a small dice of no larger than ½-inch pieces.
3. In a double boiler set over medium heat, place a bit of water in the bottom pot—making sure the water doesn’t touch the underside of the top pot. Assemble the double boiler. (If you do not have a double boiler, place a metal or glass bowl on top of a medium pot.)
4. Chop each chocolate bar into ½-inch pieces. If you plan to melt the chocolate without tempering, place it in the top part of your double boiler to melt until a smooth consistency. However, if you plan to temper the chocolate, place half the chocolate in the top part of a double boiler to melt until a smooth consistency, then proceed to temper the chocolate by slowly adding the reserved chocolate (see “How to Temper Chocolate”).
5. Using a flat rubber spatula, spread the melted chocolate into a 9×9-inch square on the parchment-lined baking sheet. Press the dried fruit and candied ginger evenly across the surface of the chocolate. Place the baking sheet in the fridge and allow 2 hours for the chocolate to firm up.
6. With a sharp knife, slice the bark into your desired size and shape. I typically slice them into rough rectangle or break them up by hand into triangles. Store in an airtight container in the fridge up to 1 week.
Gift Wrap
Cups
Ribbon
Skewers
Tape
1. Add the bark pieces to your cups. Cut small ribbon strips, and tie each one in a knot at one end of the skewer for a decorative accent. Trim any excess ribbon. Write the label or recipient name on tape, then cut it and adhere to the cup.
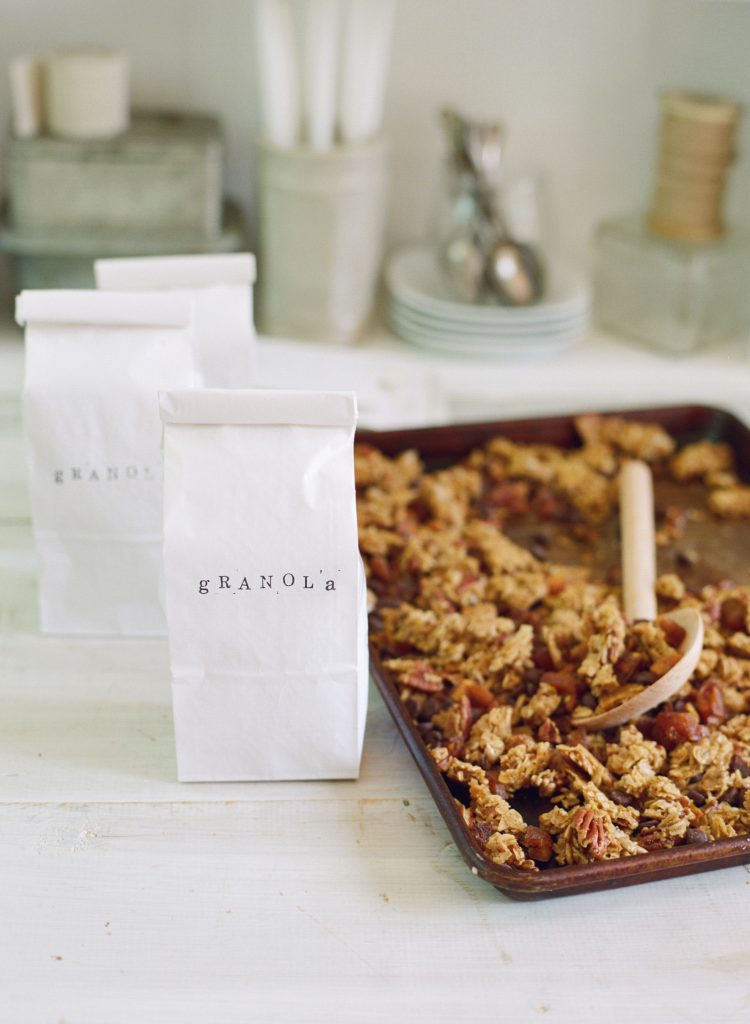
Homemade Granola, Your Way
Makes: about 7 cups
Preparation Time: 45 minutes
Ingredients
3 cups rolled oats (not quick-cooking)
1½ cups pecans, chopped (or nuts of your choice)
1 cup mix of pumpkin and sesame seeds (or seeds of your choice)
½ teaspoon ground ginger (or cinnamon, nutmeg, cardamom, or spice of your choice)
¼ cup extra-virgin olive oil
¼ cup light or dark maple syrup
¼ cup light brown sugar, loosely packed
1 tablespoon citrus zest (optional)
1 teaspoon vanilla extract
½ teaspoon fine sea salt
1 cup semisweet chocolate chips (or chips of your choice)
1 cup dried apricot (or dried fruit of your choice), chopped to match the size of other ingredients
Directions
1. Preheat the oven to 350°F. Line a large baking sheet with parchment paper.
2. In a large bowl, mix together the oats, nuts, seeds, and ginger. Spread into a single layer on the baking sheet. Roast 10 minutes until fragrant and warm.
3. In a medium pot over medium heat, mix the olive oil, maple syrup, brown sugar, citrus zest (if using), vanilla extract, and salt. Simmer about 3 to 4 minutes, just until the sugar is dissolved.
4. Carefully remove the baking sheet from the oven and, also carefully, pour the sweet mixture evenly over the granola. With an oven mitt in one hand and a rubber spatula in the other, toss the granola with the sweet mixture until very well coated. I pull all the granola into the center of the baking sheet and mix, mix, mix to coat. Then, spread the mixture back into a single layer on the baking sheet.
5. Return the baking sheet to the oven for 10 minutes until golden brown. Rotate, as needed, to ensure that it all browns evenly. Let the granola cool in the baking sheet to room temperature. Once the granola has cooled completely, pour it into a clean large bowl. Mix in the chocolate chips and the dried apricot.
6. Store in an airtight container at room temperature up to 1 month.
Gift Wrap
Stamp and ink pad
White bags
Tape
1. Stamp the label directly on the bag. If using alphabetical stamps, tape them together in a line with masking tape. Fill the bags with granola. Roll down the opening and seal with tape.
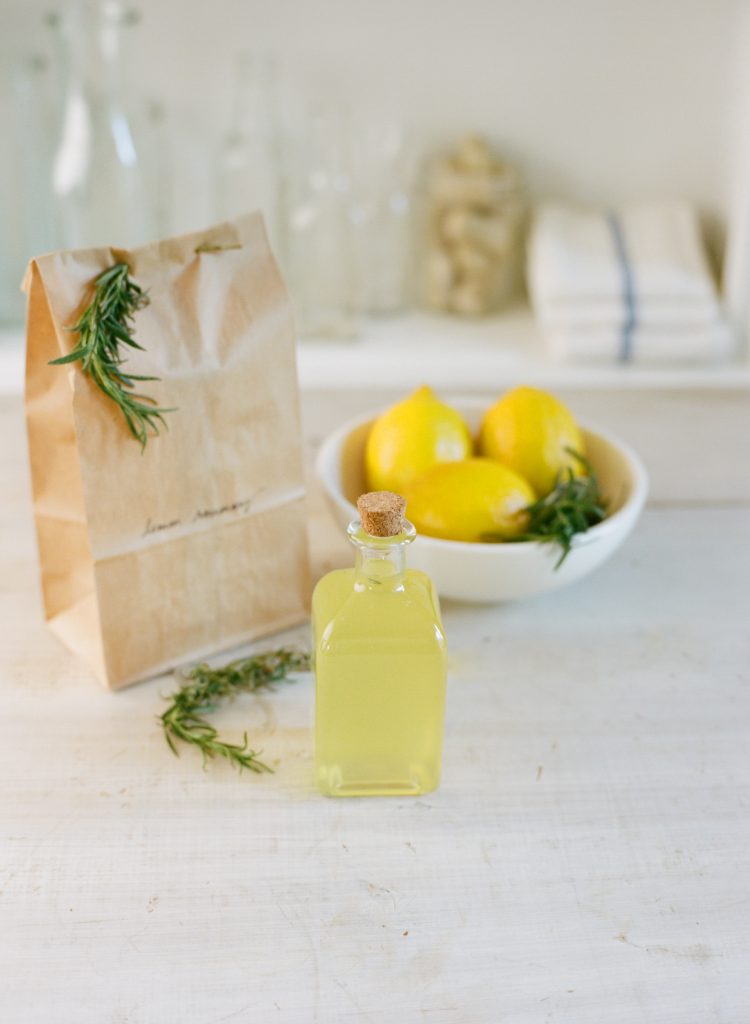
Lemon-Rosemary Simple Syrup
Makes: about 2 cups
Preparation Time: 20 minutes
Special Equipment: Glass bottles with airtight lids, sterilized Narrow-mouth funnel
Ingredients
4 large lemons
1½ cups water
2 cups granulated sugar
1 (5-inch) piece rosemary, stem and leaves
Directions
1. With a vegetable peeler, peel the zest (avoiding the white pith) into ten 3-inch strips, from 1 or 2 lemons. Slice all the lemons in half and squeeze the juice; strain to remove the seeds. Measure ½ cup lemon juice for this recipe, and reserve the rest for another use.
2. In a saucepan over medium-high heat, combine the juice, zest, water, sugar, and rosemary. Bring to a boil, stirring or swirling the pan every now and then to help the sugar dissolve. Once the boil is reached, reduce the heat to medium and keep the mixture at a low boil 5 minutes. Remove from the heat.
3. Let the syrup steep 10 minutes. Strain, discarding the zest and rosemary. Let cool at room temperature before bottling. Store in glass bottles in the fridge up to 2 weeks.
Gift Wrap
Glass bottle with airtight lid
Paper bag
Hole punch
Rosemary branch
1. Transfer the syrup to a clean pretty bottle. Write the label on a paper bag and place the bottle in the bag. Fold the top of the bag down and punch two holes equidistant from the top. Pull some of the leaves from the rosemary branch and thread it through both holes to seal the bag.
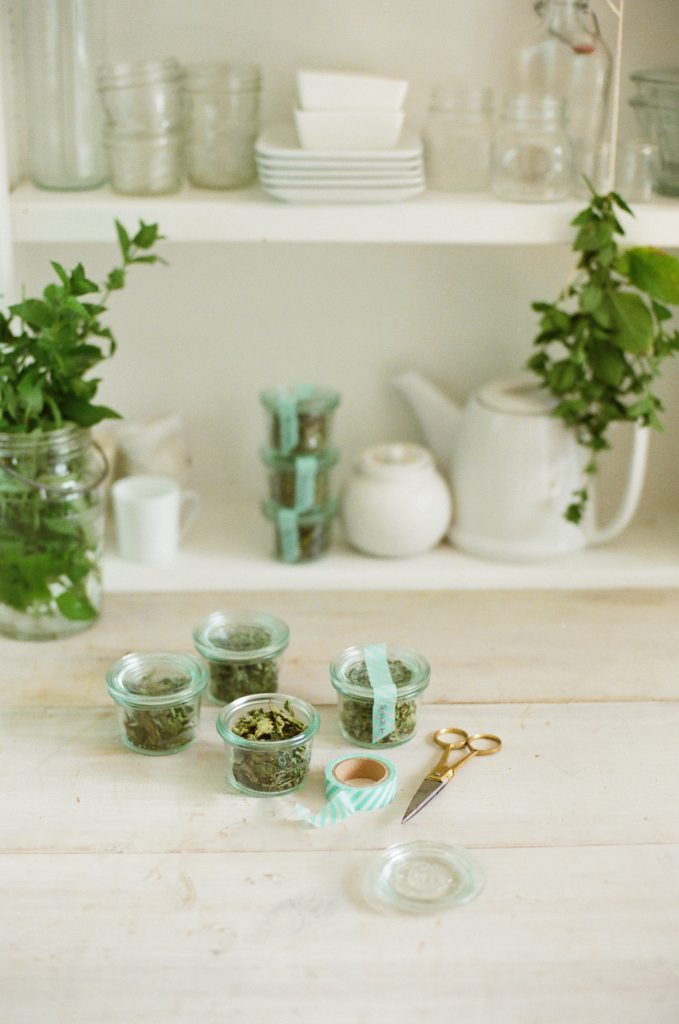
Mint Tea
Makes: 3 or 4 (2-ounce) jars
Preparation Time: 30 minutes active time (up to 4 weeks total time)
Special Equipment: 3 to 4 (2-ounce) jars (glass or other) with airtight lids
Ingredients
2 bunches (2 to 3 ounces each) mint, organic
Directions
1. Scout out a place in your kitchen to hang bunches of mint. Look for a spot that permits the herbs to hang freely with air circulating all around them and that won’t be in the way of tall (or short) people standing upright. I prefer to use a chandelier, but a window latch or even an exposed shelf will work.
2. Split each bunch of mint into 2 small bunches to form 4 small bunches. Tie one end of kitchen string tightly around the stem end of a bunch of mint. Make a double knot. Cut the long end of the string to a 12-inch length. Repeat for the remaining bunches.
3. Tie the long end of the string (attached to each bunch) to your drying spot. Let dry 3 to 4 weeks until crisp and brittle to the touch.
4. Once dried, carefully untie or remove the string. Over a piece of parchment paper, pull the leaves off of the stems and save the stems for another use. Pile all the dried mint leaves in the center of the parchment paper and leave them whole.
5. Fill clean and dry jars with all of your mint and seal. Store in an airtight container up to 1 year.
Gift Wrap
Jars (glass or other) with airtight lids
Washi tape
1. Fill jars with mint and seal. Cut a length of tape longer than the height and depth of each jar. Write the label on the end of the tape, vertically. Stick one end of the tape to the side of the jar, then wrap it around and over the top then down to the opposite side of the jar. Tuck it into the nooks of the jar. Trim the ends.
Text excerpted from Food Gift Love, © 2015 by Maggie Battista. Reproduced by permission of Houghton Mifflin Harcourt. All rights reserved.